Fudgy Brownie Cookies-Chewy Chocolate Cookie Perfection
Brownie cookies are the culinary equivalent of a perfectly executed fusion dance. Imagine the rich, fudgy decadence of your favorite brownie, but with the delightful chewiness and crispy edges of a perfectly baked cookie. It’s a dream come true for anyone who struggles to choose between these two iconic desserts. Why do we love them so much? Because brownie cookies offer the best of both worlds! They deliver that intense chocolate hit and gooey center that makes brownies irresistible, while also providing the satisfying texture and portability of a cookie. What makes them truly special is their magical ability to satisfy every chocolate craving, whether you’re in the mood for something dense and rich or something a little more universally snackable. Get ready to experience pure chocolate bliss with these incredible brownie cookies!
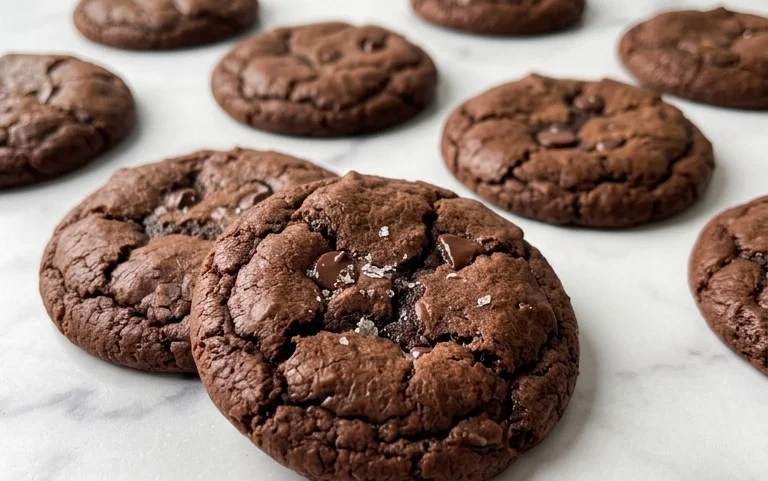
Brownie Cookies
Get ready to experience the best of both worlds with these incredible Brownie Cookies. Imagine the rich, fudgy intensity of a perfect brownie, condensed into a delightful cookie form. These aren’t just any chocolate cookies; they are a decadent treat that combines a chewy, slightly crisp edge with a molten, gooey center. If you’re a serious chocolate lover, these are about to become your new obsession. The beauty of this recipe lies in its simplicity and the incredible depth of flavor it delivers. We’re using high-quality dark chocolate and Dutch-process cocoa powder to ensure a truly profound chocolate experience. The combination of granulated and brown sugar is crucial for achieving that perfect chewy texture and a hint of caramel undertones. Don’t skip the flaky sea salt at the end – it’s the secret weapon that elevates the chocolate and balances the sweetness.
Ingredients:
- 6 tbsp (84 g) unsalted butter
- 8 oz (227 g) chopped, dark chocolate (60% cocoa)
- 1/2 cup (63 g) all-purpose flour (spooned and leveled)
- 1/4 cup (20 g) cocoa powder, Dutch process
- 1/4 tsp salt
- 1 tsp baking powder
- 1/2 cup (100 g) white granulated sugar
- 1/4 cup + 2 tbsp (83 g) packed, light brown sugar
- 2 eggs, at room temperature
- 1 tsp vanilla
- flaky sea salt for sprinkling
Instructions:
Step 1: Melting the Chocolate and Butter Foundation
The first step to achieving that signature brownie-like flavor and texture is to create a rich chocolate base. In a heatproof bowl set over a saucepan of simmering water (a double boiler), combine the unsalted butter and the chopped dark chocolate. Stir gently and continuously until both the butter and chocolate have melted completely and are smooth and glossy. It’s important to use a good quality dark chocolate with at least 60% cocoa for the best flavor. Avoid letting the bottom of the bowl touch the simmering water, as this can scorch the chocolate. Once melted, remove the bowl from the heat and let the chocolate mixture cool slightly for about 5-10 minutes. This initial cooling prevents the hot chocolate from cooking the eggs in the next step.
Step 2: Combining Wet Ingredients and Dry Ingredients
While the chocolate is cooling, in a separate medium bowl, whisk together the all-purpose flour, Dutch-process cocoa powder, salt, and baking powder. Make sure to spoon and level your flour to avoid packing too much in, which can lead to drier cookies. Dutch-process cocoa powder has a smoother, less acidic flavor and a darker color, contributing significantly to the brownie-like appearance and taste. In a larger bowl, cream together the white granulated sugar and the packed light brown sugar. The combination of both sugars is key to the texture – the granulated sugar helps with a slight crispness around the edges, while the brown sugar contributes moisture and chewiness. Beat these sugars with an electric mixer (or vigorously by hand) until the mixture is light and fluffy.
Step 3: Incorporating Eggs and Vanilla
Once the chocolate mixture has cooled slightly, it’s time to bring everything together. Add the two eggs, one at a time, to the creamed sugar mixture, beating well after each addition until fully incorporated. Ensure your eggs are at room temperature; this helps them emulsify better with the other ingredients, leading to a smoother batter. Scrape down the sides of the bowl as needed. Then, stir in the vanilla extract. Vanilla is a flavor enhancer, bringing out the best in the chocolate and adding a subtle aromatic complexity. Next, gradually add the slightly cooled melted chocolate and butter mixture to the sugar, egg, and vanilla mixture. Beat on low speed until just combined. Don’t overmix at this stage.
Step 4: Creating the Cookie Dough and Chilling
Now, it’s time to add the dry ingredients to the wet ingredients. Gradually add the flour mixture to the chocolate mixture, mixing on low speed or stirring with a spatula until *just* combined. Be careful not to overmix the dough. Overmixing can develop the gluten in the flour, resulting in tough cookies. You want to see just a few streaks of flour remaining. The dough will be quite thick and fudgy, similar to a brownie batter. For the best texture and to prevent spreading too much during baking, it’s highly recommended to chill the dough. Cover the bowl with plastic wrap and refrigerate for at least 30 minutes, or up to 2 days. Chilling solidifies the fat, which controls spread, and allows the flavors to meld.
Step 5: Baking and Finishing Touches
Preheat your oven to 350°F (175°C) and line baking sheets with parchment paper. This prevents sticking and makes for easy cleanup. Scoop the chilled cookie dough using a cookie scoop or two spoons to form balls, about 1.5 to 2 tablespoons each. Place the dough balls onto the prepared baking sheets, leaving about 2 inches between them as they will spread slightly. Gently flatten the tops of the dough balls with your palm or the bottom of a glass. This helps them bake more evenly and creates that desirable chewy center. Bake for 10-12 minutes. The edges should look set and slightly cracked, while the centers should still appear slightly soft and underbaked. This is crucial for that gooey, fudgy texture. As soon as the cookies come out of the oven, and while they are still warm, sprinkle the tops generously with flaky sea salt. The salt crystals will adhere to the warm cookies and provide a delightful sweet-and-salty contrast that truly makes these brownie cookies sing. Let the cookies cool on the baking sheets for a few minutes before transferring them to a wire rack to cool completely. Enjoy these intensely chocolatey, fudgy delights!
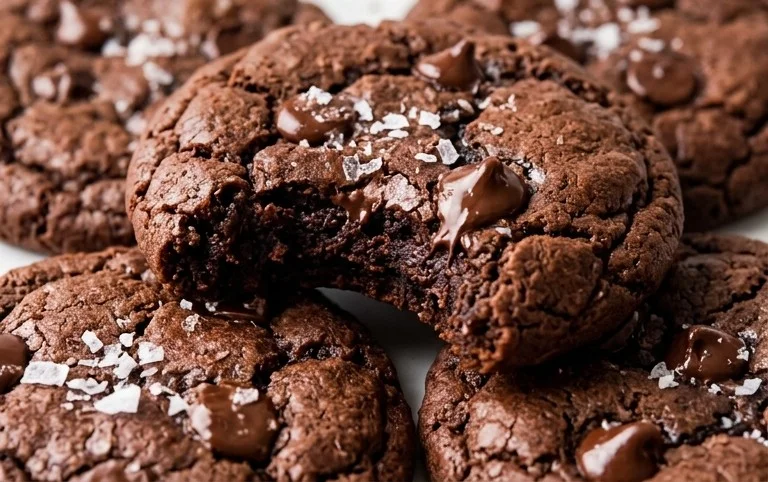
Conclusion:
I hope you’re as excited as I am to dive into making these incredible brownie cookies! What makes this recipe truly special is the perfect marriage of a rich, fudgy brownie center with a slightly crisp cookie edge. It’s the best of both worlds in every bite, offering an intense chocolate flavor that will satisfy even the most ardent chocoholic. They are surprisingly easy to whip up, making them an ideal treat for both seasoned bakers and beginners alike. I love them straight from the oven when they’re still warm and gooey, but they’re also fantastic cooled, offering a chewier texture.
These brownie cookies are incredibly versatile. Serve them warm with a scoop of vanilla ice cream for an ultimate dessert experience, or simply enjoy them with a cold glass of milk. They’re also a wonderful addition to any cookie platter, perfect for bake sales, or a thoughtful homemade gift. Don’t be afraid to experiment with variations! Add chocolate chips (dark, milk, or white), chopped nuts like walnuts or pecans, or even a swirl of caramel before baking. Get creative and make them your own!
I truly encourage you to give this recipe a try. You won’t regret the decadent chocolate goodness that awaits you!
Frequently Asked Questions:
Why are my brownie cookies not fudgy enough?
If your brownie cookies aren’t as fudgy as you’d like, ensure you’re not overbaking them. They should still look slightly underdone in the center when you take them out of the oven, as they will continue to cook as they cool. Also, make sure you’re using a good quality cocoa powder and enough chocolate. The fat content in your butter also plays a role in fudginess.
Can I make these brownie cookies ahead of time?
Absolutely! These brownie cookies store wonderfully in an airtight container at room temperature for up to 3-4 days. They often taste even better the next day as the flavors meld together. You can also freeze baked cookies for up to 2-3 months. For longer storage, I recommend wrapping them individually before placing them in a freezer-safe bag or container.
Brownie Cookies
Rich and fudgy brownie cookies with a chewy center and slightly crisp edges.
Ingredients
-
6 tbsp (84 g) unsalted butter
-
8 oz (227 g) chopped, dark chocolate (60% cocoa)
-
1/2 cup (63 g) all-purpose flour (spooned and leveled)
-
1/4 cup (20 g) cocoa powder, Dutch process
-
1/4 tsp salt
-
1 tsp baking powder
-
1/2 cup (100 g) white granulated sugar
-
1/4 cup + 2 tbsp (83 g) packed, light brown sugar
-
2 eggs, at room temperature
-
1 tsp vanilla
-
flaky sea salt for sprinkling
Instructions
-
Step 1
Melt butter in a microwave-safe bowl. Add chopped dark chocolate and stir until smooth and melted. Set aside to cool slightly. -
Step 2
In a medium bowl, whisk together all-purpose flour, cocoa powder, salt, and baking powder. -
Step 3
In a large bowl, whisk together white granulated sugar and packed light brown sugar. Add eggs one at a time, whisking well after each addition. Stir in vanilla extract. -
Step 4
Pour the slightly cooled chocolate mixture into the sugar mixture and whisk until well combined. -
Step 5
Gradually add the dry ingredients to the wet ingredients, mixing until just combined. Do not overmix. -
Step 6
Cover the dough and refrigerate for at least 1 hour to firm up. -
Step 7
Preheat oven to 350°F (175°C). Line baking sheets with parchment paper. -
Step 8
Scoop rounded tablespoons of dough onto the prepared baking sheets, leaving about 2 inches between cookies. Sprinkle tops with flaky sea salt. -
Step 9
Bake for 10-12 minutes, or until the edges are set and the centers are still slightly soft. -
Step 10
Let cookies cool on the baking sheet for 5 minutes before transferring to a wire rack to cool completely.
Important Information
Nutrition Facts (Per Serving)
It is important to consider this information as approximate and not to use it as definitive health advice.
Allergy Information
Please check ingredients for potential allergens and consult a health professional if in doubt.


