Easy No-Bake Pumpkin Protein Balls
Pumpkin protein balls are the ultimate guilt-free indulgence, perfect for satisfying those cravings while fueling your body. Autumn is undeniably my favorite season, and one of the things I look forward to most is embracing all things pumpkin spice. But what if you could enjoy that cozy, comforting flavor in a healthy, portable snack? That’s where these delightful pumpkin protein balls come in. They’re a fantastic way to boost your protein intake, especially after a workout, or to simply power through an afternoon slump. What makes them truly special is their incredible versatility – easily customizable with your favorite nuts, seeds, or even a touch of dark chocolate. Forget those bland, chalky protein bars; these offer a delicious, wholesome alternative that tastes like a treat but works like a powerhouse for your well-being.
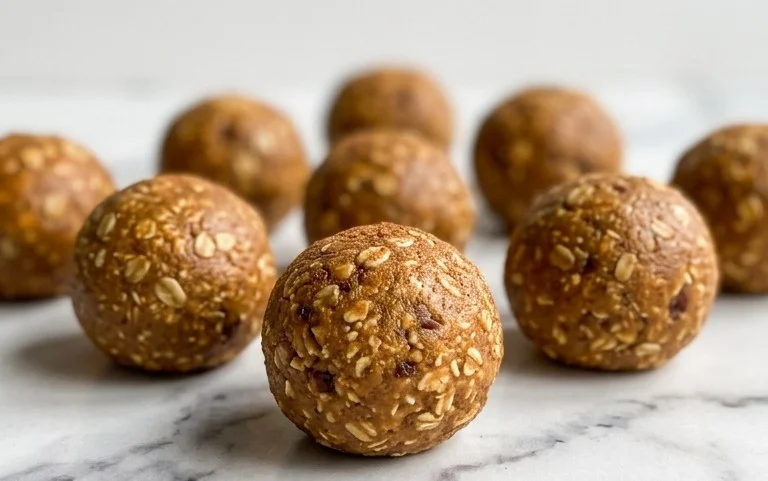
Pumpkin Protein Balls
Are you looking for a delicious and healthy snack that tastes like autumn and fuels your body? Look no further than these delightful Pumpkin Protein Balls! They’re incredibly easy to make, require no baking, and are packed with all the good stuff to keep you going. Whether you’re an athlete looking for post-workout recovery, a busy parent needing a quick energy boost, or simply someone who loves the flavors of fall, these little powerhouses are perfect for you. They’re naturally sweetened, provide a good dose of protein and fiber, and are incredibly satisfying. Plus, they’re so versatile – enjoy them as a snack, a pre-workout treat, or even a healthier dessert option. Let’s dive into what you’ll need and how to bring these little bites of autumnal bliss to life.
Ingredients:
- 1 cup rolled oats (gluten-free if desired)
- 2 scoops vanilla protein powder
- 1 tsp pumpkin pie spice
- 1/2 cup almond butter
- 1/3 cup pumpkin puree
- 1/4 cup raw honey (or maple syrup for a vegan option)
The Magic Begins: Mixing Your Ingredients
The beauty of these pumpkin protein balls lies in their simplicity. We’re going to combine all our wonderful ingredients in one bowl and let them do their magic. There’s no complicated measuring or precise tempering here; it’s all about getting everything together to form a cohesive, delicious dough.
1. Start by adding the rolled oats to a large mixing bowl. If you’re aiming for a gluten-free snack, make sure you’re using certified gluten-free rolled oats. This is your base, providing substance and a good source of complex carbohydrates and fiber to keep you feeling full and energized.
2. Next, add your vanilla protein powder. I find that vanilla complements the pumpkin flavor beautifully, but feel free to experiment with unflavored or even a caramel-flavored protein powder if you have one on hand. Ensure the protein powder is well-distributed amongst the oats. This is where the primary protein boost comes from, making these balls a fantastic choice for muscle recovery and satiety.
3. Now, sprinkle in the pumpkin pie spice. This little blend is key to that quintessential autumn flavor. It typically contains cinnamon, ginger, nutmeg, and cloves, all working in harmony to create a warm and comforting aroma and taste. Don’t skimp on this – it’s what truly elevates these balls to a fall-themed delight.
4. In a separate, smaller bowl, combine your wet ingredients: the almond butter, pumpkin puree, and raw honey (or maple syrup). Using almond butter provides healthy fats and a wonderfully creamy texture that will bind everything together. The pumpkin puree adds moisture, a lovely earthy flavor, and a boost of vitamins. The raw honey offers natural sweetness and a lovely, subtle flavor; if you’re opting for maple syrup to keep it vegan, a good quality pure maple syrup will work wonders. Whisk these wet ingredients together until they are smoothly combined. This pre-mixing step ensures that the liquid ingredients are evenly distributed before they meet the dry ingredients, making the final mixing process smoother.
Bringing It All Together: Forming the Dough
Once your wet ingredients are nicely blended, it’s time to introduce them to the dry ingredients and create our protein ball dough. This is the most satisfying part, as you can feel the mixture coming together.
5. Pour the wet ingredient mixture into the large bowl with the oats, protein powder, and pumpkin pie spice. Now, using a sturdy spoon or a spatula, begin to mix everything together. Initially, it might seem like there’s not enough moisture, but keep mixing! As you incorporate the wet and dry ingredients, the almond butter will start to coat the oats, and the pumpkin puree will distribute its moisture. Continue to stir and fold until a thick, sticky dough forms. You want it to be moist enough to hold together when squeezed but not so wet that it’s unmanageable. If, for some reason, your mixture seems too dry and crumbly, you can add another teaspoon or two of pumpkin puree or almond butter. Conversely, if it’s too wet, you can add a tablespoon or two more of rolled oats or protein powder. The key here is to achieve a consistency that allows you to easily roll it into balls without it sticking excessively to your hands.
Rolling Your Delicious Orbs
With your delicious dough ready, the final step is to shape these into perfect little protein balls. This is where you can get a little hands-on and enjoy the process.
6. Now for the fun part – rolling! Take a small portion of the dough, about a tablespoon’s worth, and roll it between your palms. You want to aim for bite-sized balls, roughly 1-inch in diameter. Don’t worry if they aren’t perfectly round; rustic charm is part of their appeal! If the dough is sticking to your hands, you can lightly dampen them with water or coat them with a tiny bit of almond butter before rolling. This step is crucial for portion control and makes them easy to grab and go. Make sure you roll them firmly enough so they hold their shape.
Chilling for Perfection
After all your rolling efforts, these little gems need a little time to firm up and really meld their flavors. This chilling period is essential for the best texture and taste.
7. Once all the dough has been rolled into balls, arrange them on a plate or a baking sheet lined with parchment paper. This prevents them from sticking to the surface. Place the plate or baking sheet into the refrigerator for at least 30 minutes. This chilling time allows the ingredients to bind together properly, making the balls firmer and easier to handle. It also allows the flavors to deepen and mingle, creating a truly satisfying snack. You can store these in an airtight container in the refrigerator for up to a week. They’re also freezer-friendly if you want to make a larger batch!
Enjoy your homemade Pumpkin Protein Balls! They are the perfect healthy indulgence for any time of day.
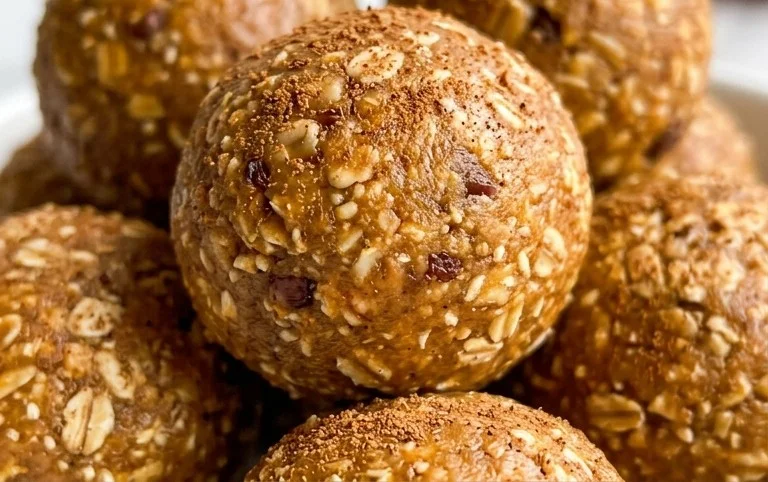
Conclusion:
And there you have it – your simple yet incredibly satisfying recipe for delicious Pumpkin Protein Balls! These little powerhouses are a fantastic way to incorporate healthy fats, protein, and those lovely autumn spices into your diet, making them the perfect guilt-free snack or post-workout treat. Whether you’re craving something sweet, need a quick energy boost between meals, or are simply looking for a fun and easy recipe to whip up with the family, these pumpkin protein balls deliver on all fronts. They’re naturally gluten-free and can be easily adapted to suit your dietary needs, making them a versatile addition to any healthy eating plan.
Feel free to get creative with your serving! Enjoy them straight from the fridge for a firmer texture, or let them sit at room temperature for a slightly softer bite. They pair wonderfully with your morning coffee, a glass of plant-based milk, or even crumbled over yogurt or oatmeal. For variations, consider adding a sprinkle of chopped nuts for extra crunch, a tablespoon of chia seeds for added fiber, or a dash of cinnamon or nutmeg for an intensified pumpkin spice flavor. Don’t be afraid to experiment with different protein powder flavors – vanilla and unflavored work beautifully, but a chocolate protein powder could also create a delightful mocha-esque treat!
I truly encourage you to give this Pumpkin Protein Balls recipe a try. They are so quick to make, require no baking, and the results are consistently delicious and energizing. Happy snacking!
Frequently Asked Questions:
Can I make these pumpkin protein balls ahead of time?
Absolutely! These are perfect for making in advance. Once rolled, store them in an airtight container in the refrigerator for up to a week. You can also freeze them for longer storage – just place them on a baking sheet to freeze individually before transferring to a freezer-safe bag or container. They’ll typically last for up to 2-3 months in the freezer.
What kind of protein powder works best for these pumpkin protein balls?
Most types of protein powder will work well! Vanilla or unflavored whey, casein, or plant-based protein powders (like pea, soy, or brown rice) are excellent choices and allow the pumpkin flavor to shine. If you enjoy a richer taste, feel free to experiment with chocolate protein powder for a different flavor profile.
My mixture seems too sticky or too dry. How can I adjust it?
If your mixture is too sticky to roll, gradually add a little more protein powder or a tablespoon of oat flour at a time until it reaches a workable consistency. If it’s too dry and crumbly, add a small amount of liquid, such as a teaspoon of milk (dairy or plant-based), water, or even a touch more pumpkin puree, until it comes together.
Pumpkin Protein Balls
Easy and healthy no-bake protein balls perfect for a quick snack, featuring pumpkin and warm spices.
Ingredients
-
1 cup rolled oats (gluten free if desired)
-
2 scoops vanilla protein powder
-
1 tsp pumpkin pie spice
-
1/2 cup almond butter
-
1/3 cup pumpkin puree
-
1/4 cup raw honey
Instructions
-
Step 1
In a large bowl, combine the rolled oats, vanilla protein powder, and pumpkin pie spice. Stir well to mix the dry ingredients. -
Step 2
Add the almond butter, pumpkin puree, and raw honey to the bowl with the dry ingredients. -
Step 3
Mix all ingredients together until a thick, uniform dough forms. This may take a few minutes of stirring and pressing. -
Step 4
Roll the dough into small, bite-sized balls (about 1-inch in diameter). -
Step 5
Place the protein balls on a parchment-lined baking sheet or plate. -
Step 6
Refrigerate for at least 30 minutes to allow the balls to firm up before serving.
Important Information
Nutrition Facts (Per Serving)
It is important to consider this information as approximate and not to use it as definitive health advice.
Allergy Information
Please check ingredients for potential allergens and consult a health professional if in doubt.


